How To

Change is one of the most sensitive topics in construction

Construction has just started on your new custom home when you decide that you want to reorient your kitchen island and make your master bedroom closet just a little bigger.

You may think that making small changes after your home construction has started should be a simple feat. Often, however, that’s not the case. Changes during custom home construction is an especially sensitive topic and it can be fraught with frustration for homeowners.

It’s understandable how someone without an extensive background in construction and design might think changes early on in the construction process shouldn’t be a big deal, especially if the room in question hasn’t been built yet. However, changes—and even what appear to be very minor ones—can affect many other factors that are moving the project forward, some of which are unbeknownst to the homeowner. Changes can be expensive no matter when they happen.

For example, moving a window just three inches to the left might seem simple. But to make that change, the architect and engineers may need to weigh in and other components of the room might need to be shifted or adjusted as well to make the room flow. Even the tiniest change can alter a project timeline and add to the budget.

When it comes to custom home construction, changes, however, almost always naturally occur over the course of a project. That’s also the case, and perhaps even more so, for home remodels and renovations because you only truly know what’s behind the walls of an older home after you open them up.

There are two primary types of design changes on construction projects. One, the owner changed their mind about the design or asks for new or additional work be done. And two, the project can’t be successfully completed unless revisions are made to the initial project design. These changes might happen if there are errors and omissions in plans or specifications, if you have to substitute building materials or construction methods, or if there are code changes. As an owner, you might also run into financial complications and need to scale back your project.

Changes can be frustrating for both homeowners as well as for builders and designers. No one likes to see a worker’s craftsmanship dismantled because of a change that could have been prevented in the first place.

As you move forward with your custom home build, renovation or remodel, know that there are ways in which you can help to minimize the changes you request during your project, and ways in which you can make changes easier when they do happen. By taking these extra steps you can help to ensure your project finishes both on-time and on-budget.

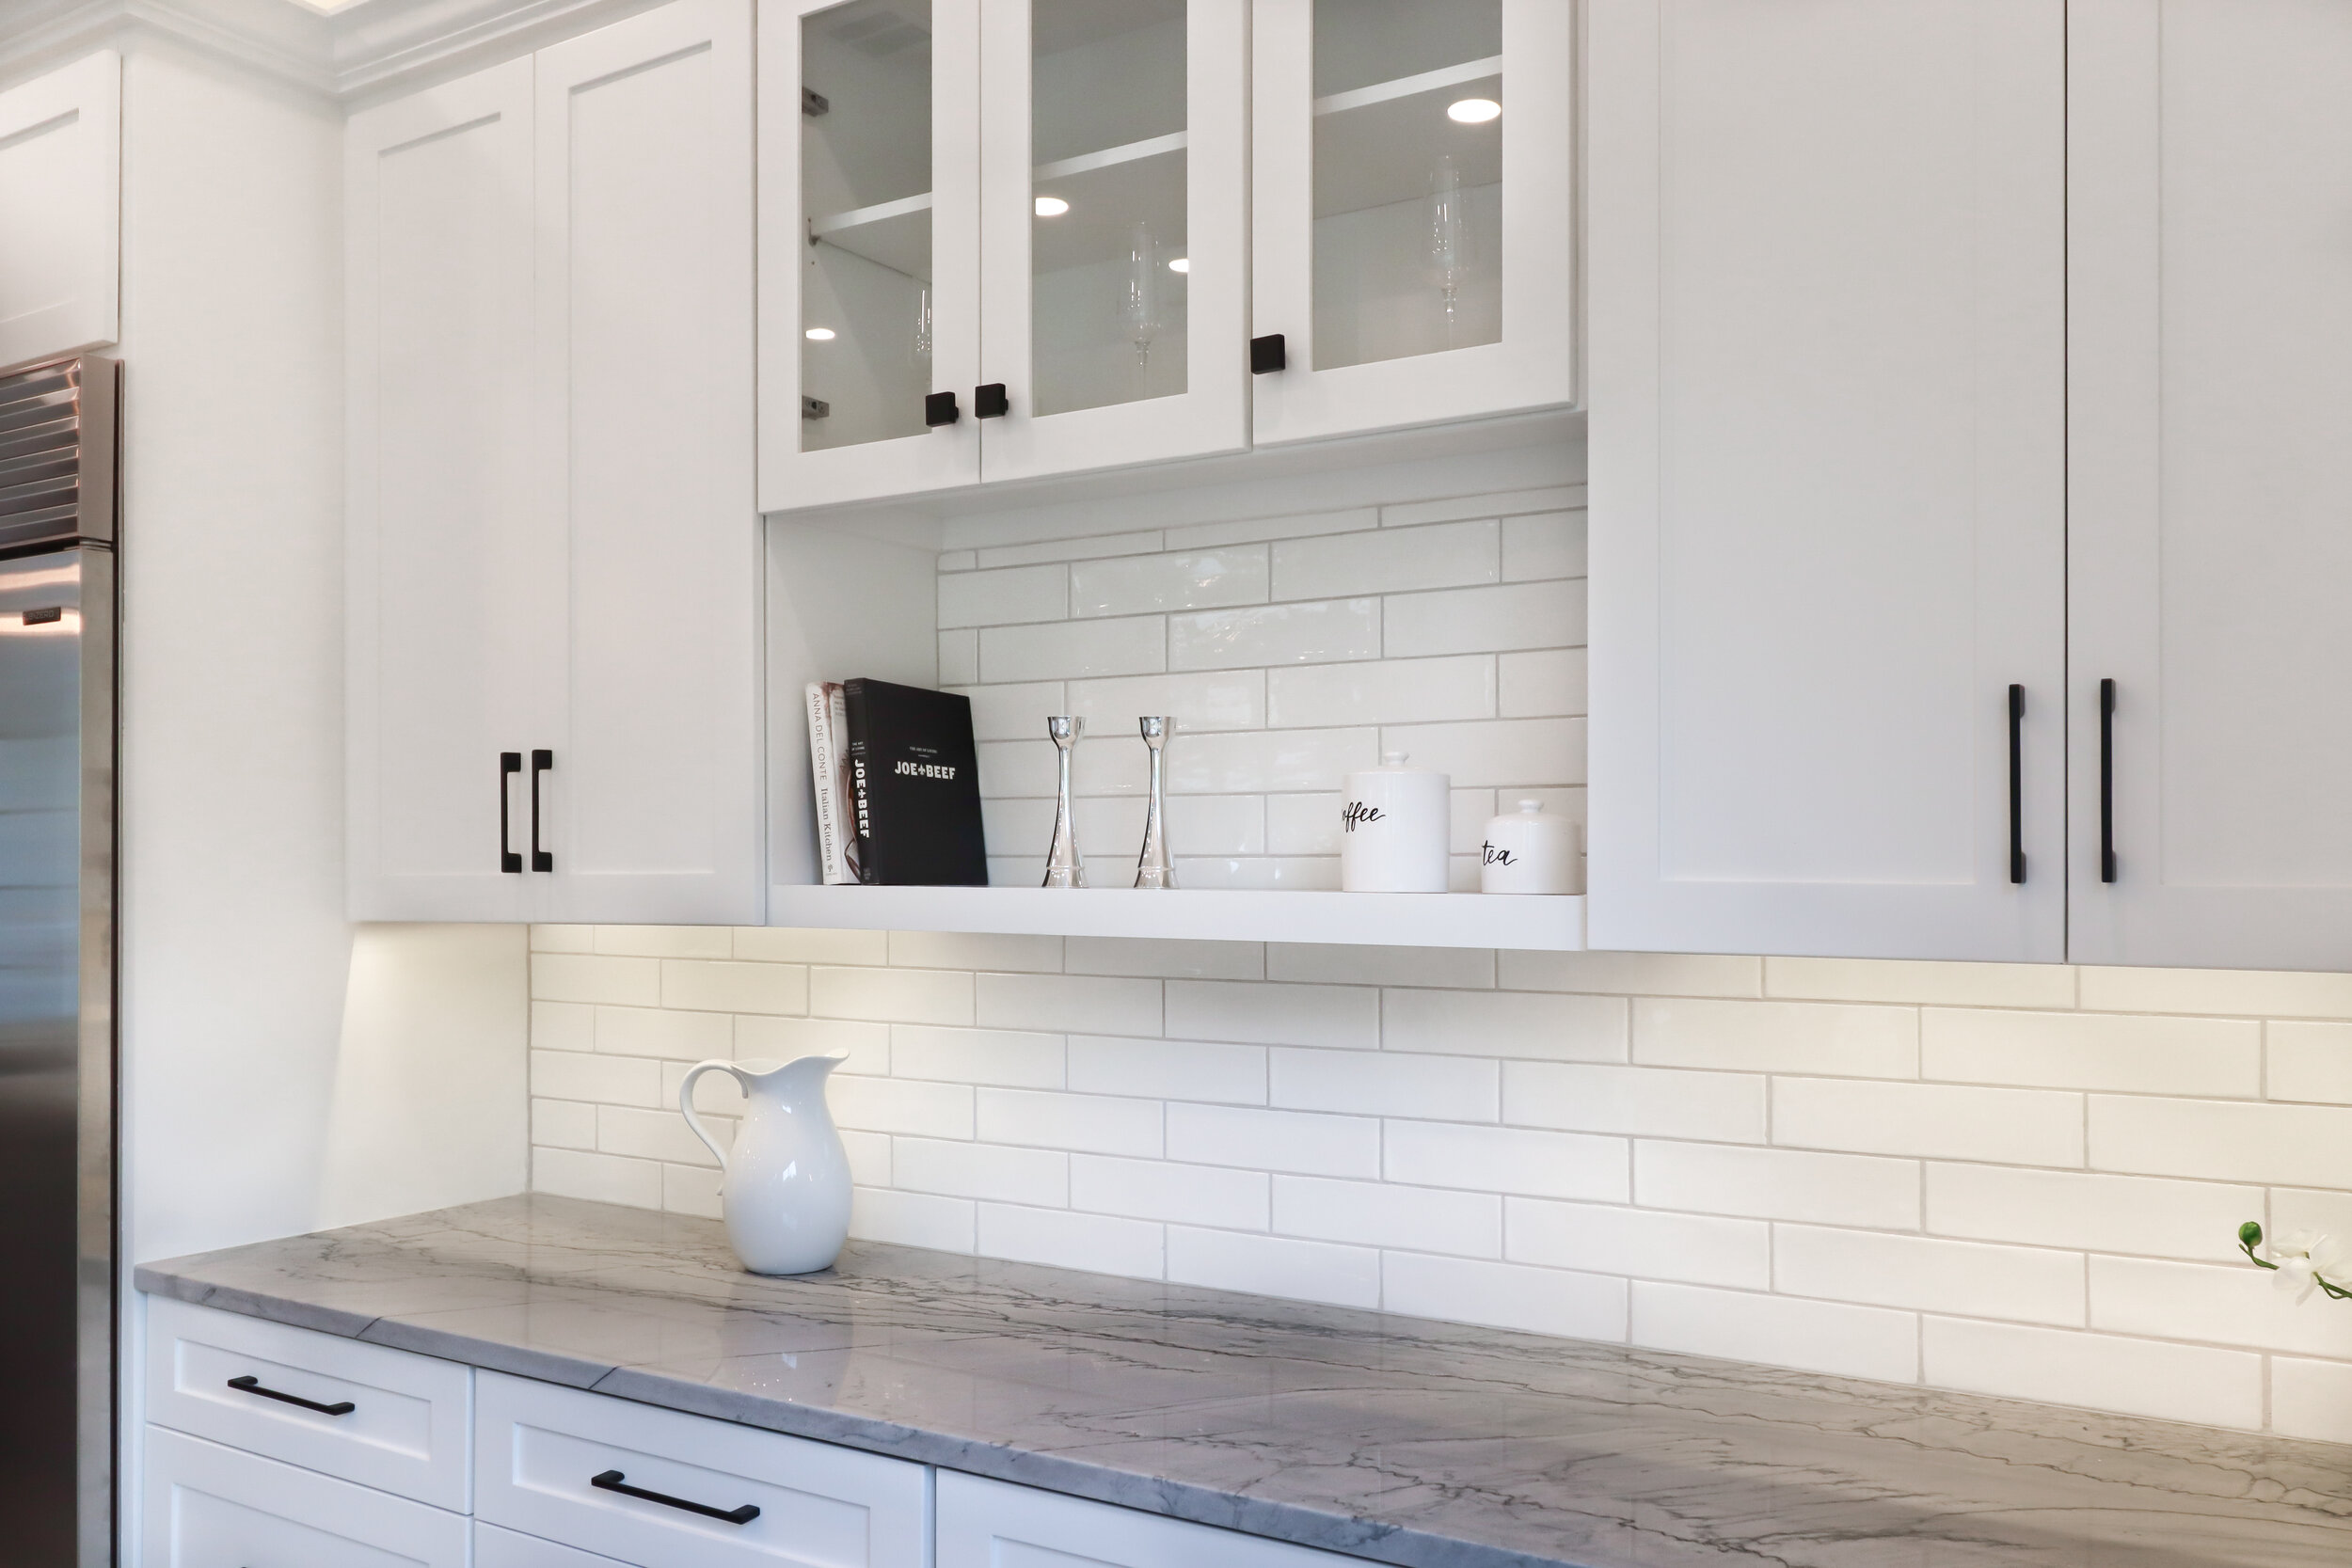
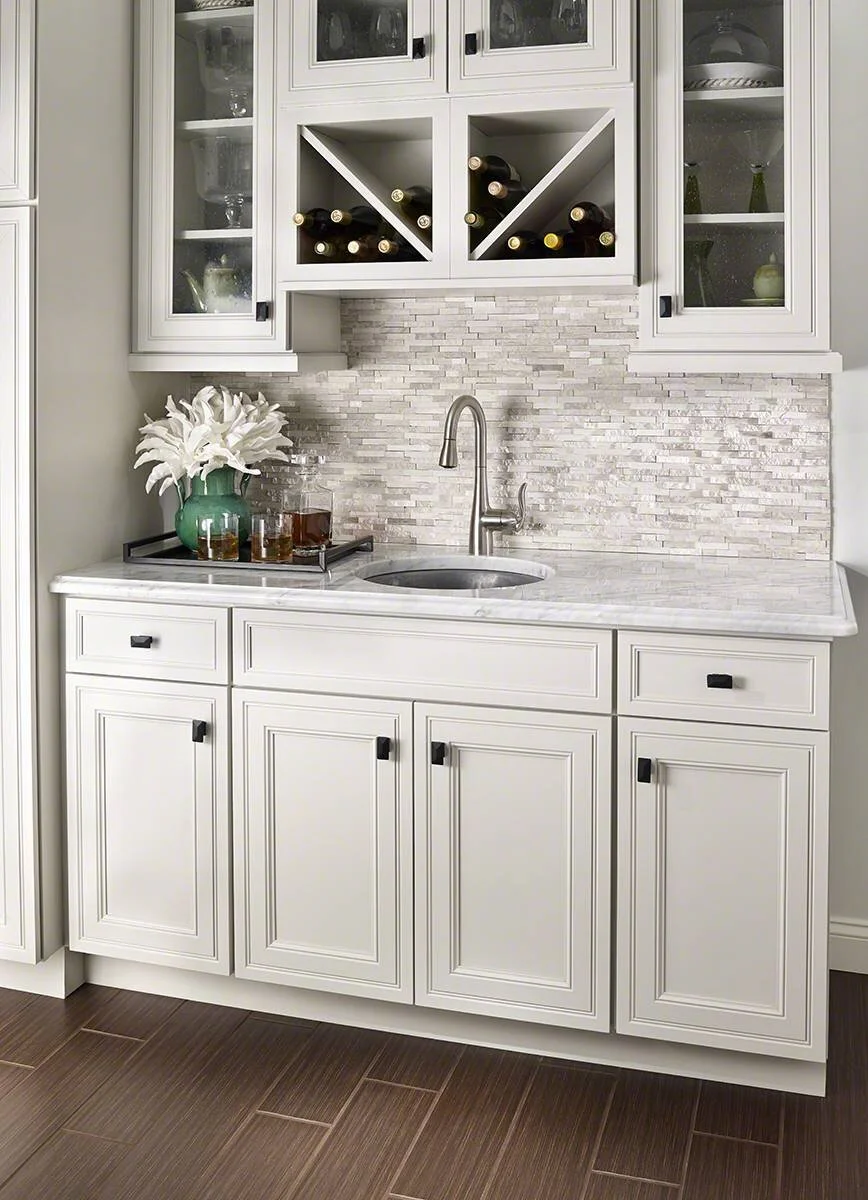
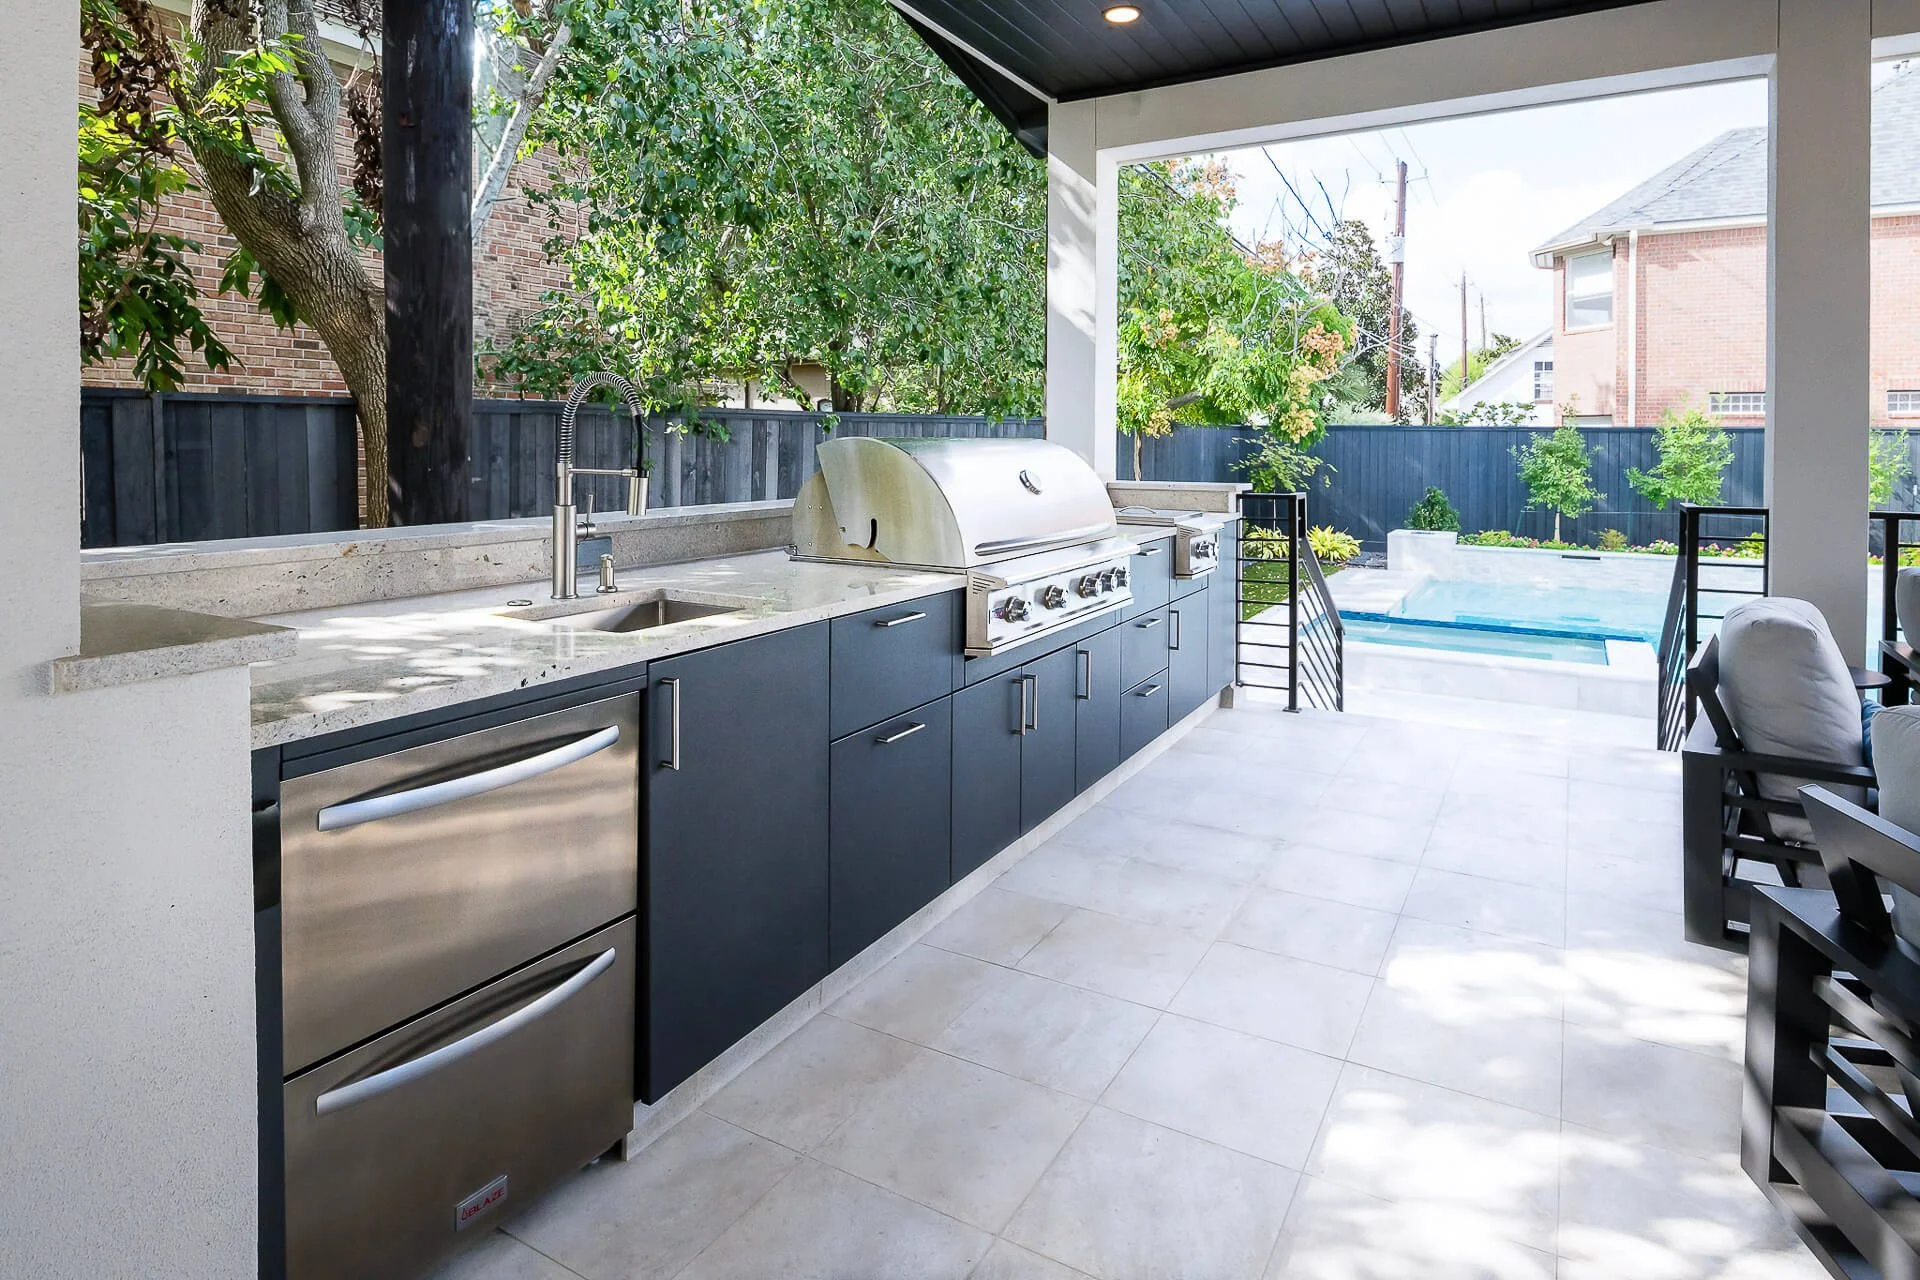
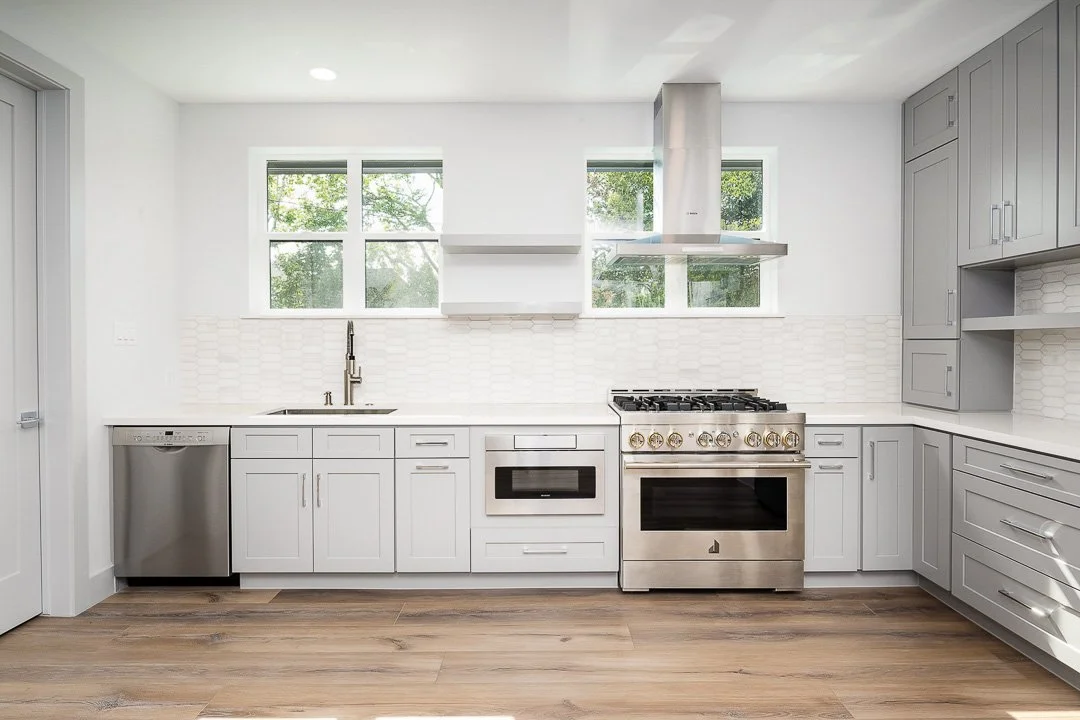
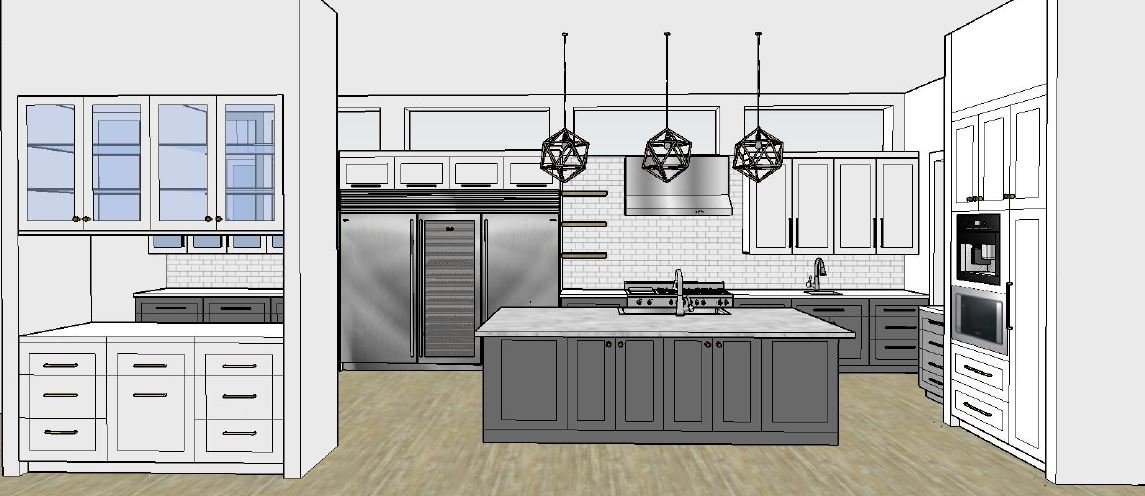
Do your research. To minimize change, spend plenty of time in the planning stages of your project familiarizing yourself with different styles and aesthetics so you’re confident about the design and components you want for your home. Look at images online and in magazines. Many custom homebuilders will also let you visit model homes or homes in progress to get a feel for different design elements. Work closely with your architect and interior designer to nail down as many design decisions as possible before construction starts.

Set realistic expectations. Know that changes will cause delays, sometimes short ones, other times extensive ones based on the number of steps needed to make the change. For example, extra costs come into play because sometimes certain parts of the projects have to stop until the change is made and that might require coordinating with various vendors.

Build change into your budget. Knowing that inevitable changes will cost money, set aside some cash for them during the planning stages of your project so you’re not caught off guard without sufficient funds. A good rule of thumb is 5-10% of your overall budget.

Be transparent. Transparency and efficient communication between all parties is critical. Make sure your builder is involved in all of the choices and the decisions that you’re making.

Ask for a plan review. Ask your designer or builder to review plans and specs. Finding errors or omissions regarding your scope of work that can be addressed or corrected prior to construction starting will save you time and money down the line.

Home Automation. How much do you really need?

Home automation is more common these days since it’s become cheaper and easier to install, with more and more people realizing the numerous benefits it can bring. Homeowners who’ve embraced home automation are benefiting from added convenience and safety plus energy savings. As you build your custom home, home tech can be a wise investment.

Home automation monitors or controls systems like lighting, temperature, home entertainment and even your appliances, letting you control them from your smartphone, tablet or computer – with just the push of a button or a voice command.

It’s an investment up front that can pay off in the long run. Indeed, smart home features can lift your home’s resale value by up to 5%, according to Consumer Reports. Home appraisers are also starting to look at the value of home automation. What’s more, some insurance companies will give a discount to homeowners who have home automation.

But, with so many options, it can be hard to figure out what you really need. As you begin to research home automation products, think about your budget, your home design and your lifestyle. For example, are you often away from home or out of town, or do you forget to lock your front door several times a week? If so, an automated home security system with a smart entry system probably makes sense.

Many people choose to start with the basics. They buy a smart home hub like Amazon’s Alexa or Google Home. Through a smart home hub, you can connect and control other smart home products. Then, they invest in a few key home automation products. Later, once they’ve lived in their custom build for a while and figured out what other home automation products may make sense, they add on some “nice-to-haves.”

Office+with+built+ins.jpg

Automating home security

Many people choose to start with automating their security and alarm systems, including smart doorbells and smart locks. It’s a great way to protect your home.

Smart doorbellsPaired with smart video cameras, they livestream video to your device so you can see who’s coming by your home. Through most, you can talk to and listen to whoever is outside your front door.

Smart locks These look like a regular dead bolt lock but are connected to Bluetooth or Wi-Fi, or, they can have touchscreen keypads you use to set a code. Smart locks can be pricey at a few hundred dollars upfront. But they allow you to open your door for guests remotely, which can come in handy for letting in dog walkers or a cleaning person. Depending on the lock, you can also set it to sense your smartphone and have it automatically lock the door when you leave the house with your phone.

A smart thermostat

A smart thermostat can lead to big savings when it comes to heating and cooling a home, which accounts for almost 50% of energy use in the average home in the U.S.

This type of thermostat can learn your habits and adjust the temperature when you’re not at home so you’re not cooling or heating an empty house.

They may cost a few hundred dollars up front, but you’ll quickly recoup that money with energy bill savings. Many energy companies also offer a rebate for smart thermostats.

Outlets and light bulbs

Smart outlets convert any appliance into a smart device, and they’re inexpensive, typically costing less than $75. They can come in handy if you want to start your slow cooker while you’re away from home or you forgot to turn off your hair straightener.

With smart light bulbs, you can turn your lights on and off when you’re away from home, helping save on energy costs. You can also program them to turn on and off at certain times of the day, a great safety feature for when you’re away on vacation.

Depending on the smart light bulbs, you might also be able to dim them remotely or even change the color of the bulb. A major benefit of smart light bulbs is that they last many longer than regular bulbs and only consumer 8.5 watts of electricity versus the 60 watts conventional bulbs can consume.

Carbon monoxide and smoke detectors

With smart carbon monoxide and smoke detectors, you won’t have to worry about frequently replacing batteries. A smart carbon monoxide and smoke detector will alert you on your phone in case of an emergency.

Contemporary pool lights.jpg

Other areas to automate

In addition to the above basic home automation devices, there are plenty of other areas in your home that you can automate. These include:

·       Sprinkler system

·       Window shades

·       Pet feeders

·       Pool cleaners

·       Window washers

·       Murphy beds

·       Refrigerators

·       Washers and driers

·       Basement water leak sensors

·       Garage door openers

While home automation devices are an upfront investment that will add to your expenses as you’re building your custom home, in the long run, they make sense. By investing in home automation, you’re adding convenience to your life, you’re saving money and you’re helping to increase the value of your home.

6 Types of Backsplashes to Consider for Your Home

Backsplashes are much more than just a pretty accent.

They protect kitchen and bathroom walls from the heat of cooking, from grease stains, and from water spots that can damage drywall or even encourage mold growth. They make cleaning easy, and yes, depending on what kind you choose, they can make a design statement.

Backsplashes are most often installed in wet areas and cooking areas, so above sinks, ranges, or cooktops. You’ll typically find backsplashes in your:

·       Kitchen or outdoor kitchen

·       Wet Bar

·       Laundry room

·       Mudroom

·       Bathroom

Backsplashes come in a variety of materials, each with their pros and cons and price points.

1) Tile and Mosaic Backsplashes

Tile and Mosaic Backsplashes are the most common and versatile type of backsplash available in a wide array of materials, colors, and patterns.

Ceramic/Porcelain. This is perhaps the most traditional tile material that’s used for backsplashes. It’s affordable, durable, and easy to clean.

Glass tile. For a more contemporary look, choose glass. Generally, glass tile is just as washable, stain-resistant and durable as ceramic/porcelain tile. Glass’ translucence, however, means it has visual depth, giving the overall tile color a beautiful watery glow.

Natural Stone. Choose natural stone for a classic, luxury look. Natural stone is timeless and elegant, but it’s also easily scratched or chipped and can sometimes stain and be difficult to maintain. Even though, these days, porcelain does a great job of mimicking natural stone, the true luxury look of natural stone can’t be perfectly replicated. Keep in mind, though, that stone costs at least 20-30% more than porcelain.

TIP: If cost is a big consideration when you’re choosing a backsplash, thanks to inkjet printing technology, you can find porcelain tile that looks very much like natural stone.

Tile and mosaic cons: The major con for this material is grout lines. The smaller the tile pieces, the more grout lines the backsplash will have. Grout must be properly sealed, or an epoxy- or acrylic-fortified grout should be used for stain-resistance.

Subway tile is the most popular backsplash, since it’s practical, timeless, and works in interiors of all types.

2) Slab Backsplashes

Slab backsplashes are made of a continuous material that’s sometimes matched to the countertop. Without joints, grout lines or any other areas where dirt can collect, they can create a bold and seamless look. Use timeless traditional materials, installed in a modern way (as one large piece), to balance your contemporary or transitional kitchen.

Natural Stone Slab Backsplash. Unlike stone tile, which has veins going in every direction, a stone slab has connected and structured veins, giving it a totally different overall effect. Know though that, depending on the specific material, some can stain.

Glass Sheet Backsplash. This material offers a minimalistic and modern look. The bouncing light off of glass will make your kitchen look even bigger with glass sheet backsplash. For back-painted glass, color options are unlimited, offering a customizable look while being highly functional and easily maintained.

Other options for a solid backsplash include a Thin Slab Porcelain and Quartz Slabs. Both can be found in patterns mimicking natural stone, in materials like leather, or in a solid color of your choice.


3) Stainless Steel Backsplash

A beautiful reflection from a stainless steel surface will add brightness and an industrial effect to your space. Stainless steel backsplashes come in a variety of geometrical shapes and patterns, making them an excellent choice for just about any kitchen or bathroom design.

MSI

MSI

TIP: Stainless steel backsplashes work great for an outdoor kitchen because of their low maintenance and durability. Stainless steel is more resistant to corrosive effects than most kinds of tile.


4) Shiplap Backsplash

Shiplap backsplashes are classic and never go out of style.

Shiplap is a wooden board with a groove cut into the top and bottom, which allows the boards to fit together, giving them a unique appearance.

You can hang a shiplap backsplash horizontally or vertically depending on your space and preference.

If used in the kitchen and bathrooms, shiplap backsplashes require a protective finishing coat to prevent food stains and moisture damage. A cementitious shiplap (like the one made by James Hardie Building Products) should be used behind cooking surfaces.

McGee

TIP: A shiplap backsplash works well in a mudroom or laundry room. It will protect your walls while also adding texture and interest to your space.


5) Brick or stone veneer

Brick or stone veneer is often a good fit for a farmhouse or industrial style. This type of material has an undeniable rustic charm and easily becomes a focal point of your space.

Keep in mind, though, that while a brick backsplash is known for its strength and durability, it’s extremely hard to clean, and especially when it’s above a range.

6) A mix of materials

Sometimes, the best choice is to use a variety of materials when designing your backsplashes.

For example, some natural materials look unique and are gorgeous, but they’re extremely hard to take care of – they’re sensitive to stains, have tendency to chip, and they can’t withstand harsh chemicals. You can use these hard-to-care for materials in some spots, but then, use a more durable material in areas where stains, heat or water will affect the backsplash. You can enjoy the best of both worlds.

You might also use a mix of materials as an aesthetic choice. A variety of colors, textures or shapes can be a design statement, and make your backsplash a focal point.

TIP: Mixing a marble backsplash with quartz slab, or metal sheet with marble slab are good examples of how to take advantage of both aesthetics and practicality.

With so many backsplash options, choosing one might at first feel overwhelming. But it doesn’t have to be. Start by thinking about what aesthetic you’re going for. Then, consider how much time you want to spend cleaning. Finally, factor in your price point. With the wide variety of options, you should be able to find material that meets all your criteria at a reasonable price.

Follow these tips to save money on your new build. Learn where to cut and compromise when building your home!

A fancy bathtub, kitchen tiles sourced from Italy, a wraparound porch. As you’re planning your new, custom build, it’s normal to be excited about all the possibilities—the special features and finishes you’ve always wanted in your dream home.

Why showers are replacing tubs

But often, budgets are limited. Some busy future homeowners also want to help customize and personalize their home by choosing the features and finishes themselves. That takes time, however, and will likely add to the length of the project as the number of features continues to grow and the homeowner struggles to find time.

With custom home builds, it’s okay not to have it all. To make your project less stressful and more pleasant, it helps to decide which features you can’t live without and which you can compromise on. Some homeowners find only after they’ve completed a build that they included items they rarely use. Think about your needs, and current and anticipated future lifestyle, as you plan your project. Setting realistic goals that include possible compromises and cuts also helps to reduce overconsumption and protects the planet.

Cozy Office ideas.JPG

Our Imogene Project

Consider these top six types of compromises and cuts that can be made during planning and construction of new home builds:

1. Forgo a tub in the master bath. A big, freestanding bathtub can be a nice focal point in a master bath, but in recent years some homeowners have decided to leave out a tub in the master bath and instead use the space for a shower. Not including a tub can save both money and time spent agonizing over the right tub.

2. Saving items for future installation. Maybe you want a pool or an elevator installed in your custom build, but you just don’t have the funds. The groundwork can be laid for items like pools and elevators during your build, making it less expensive for you to complete the installation down the road.

Building a pool in a flood zone?

3. Think about rooms you can combine. Some homeowners choose to combine rooms they don’t use all the time to cut down on costs. For example, if you don’t frequently have guests who stay with you, you could combine a guest room with an office. Other homeowners have paired their dining room with a library.

4. Ditch the porch. Porches in Houston, where temperatures can top 100 degrees in summer, are more often than not designed for a particular look and are infrequently used, especially on the front of the house. On a tight budget? Consider forgoing a porch.

How Much Does It Cost to Convert Windows to a Patio Door?

5. Reconsider sky-high ceilings. High ceilings look and feel great. They can open up rooms and researchers have found they just make us feel good. But they also cost more to build and they can cause heating and cooling costs to add up.

6. Scale back the size of your kitchen island. Kitchen islands can help your kitchen flow and provide a great space for food prep. The average kitchen island measures at about 3 feet deep by 6 ½ feet long. Some people like to have even bigger islands, but those over 5 feet deep are just too large to efficiently use or clean. Creating a large island for your kitchen also adds a good deal to building costs.

Double Kitchen Islands. A Trend Not Going Anywhere

As you’re planning and executing your custom home build, keep in mind these six compromises and cuts. If you find yourself nearing the end of your budget or you’re too busy to take the time to browse all the features and finishes you might want, consider scaling back, at least for now. It’s okay not to have it all, and you can always add additional features later.


You May Also Like:

5 things to help keep you from blowing your budget

1.JPG

Worried about going over budget on your new build? Here’s one way to help curb costs: take the time to fine-tune your architectural plan and scrutinize it before submission. The more you research and prepare ahead of time, the fewer surprises you’ll encounter and changes you’ll have to make.

In general, it’s always a good idea to save 10 to 15% of your budget as a buffer when planning a project. Unfortunately, it’s not unusual for homeowners to spend more than that, but that doesn’t have to be the case.

In a construction project, a variety of factors can elevate or lower your costs. A good architect and builder help clients navigate their unique budget, style preferences and family needs. To make sure you and your team are moving in the right direction, consider these five often-overlooked factors that could play a big part in your budget planning.

2.jpeg

1) Gross square footage. Construction costs are normally quoted in “net,” “livable,” or “air-conditioned” space. But depending on the size and design of your custom home, your architectural plan may include many more non-livable areas than you’re expecting. A grade level basement, a porch, or garage, for example. These areas still cost a good amount of money to build—mostly in foundation costs—so make sure you really want those areas before committing.

2) Your lot height. Building your home up off the ground, otherwise known as “above grade,” is more expensive than “on grade.” If you try to size up your lot yourself, you won’t be able to tell how high off the ground you’ll need to build your first floor. To get your lot’s exact height, pay for an elevation certificate and a topographic survey. That will show you how high you should build above grade. In Houston, lot heights are measured from sea level. The MFPE (Minimum Flood Protection Elevation) is the lowest elevation above sea level that you can build your first floor, according to the city or FEMA. In general, the lower your lot’s elevation, the higher you have to build and the more it will cost. In Houston, homeowners in a flood zone may want to build even higher than required. Knowing your lot’s elevation will give you a better sense of the cost of building up.

3) Dead corners and unused spaces. Look for dead corners and spaces you can incorporate into an existing room or remove entirely. Your garage floor and the first floor will be at different heights if you’re in a flood zone—your first floor has to be above a certain elevation, while your garage floor needs to be at ground level to allow you to drive your car into your garage. We usually use this height difference to build a storage space, and our clients love it.

3.JPG

4) Door sizes and the way doors open. To avoid change orders, check all of your door sizes in your architectural plan and the direction each door opens. For most interior doors, 30” is the standard width. Some doors, however, should be wider. We’ve seen homeowners remove door casings and door jambs to fit a washing machine into their laundry room. Carefully checking your plan to make sure your laundry door is at least 36” wide can help avoid similar issues. It’s this type of design element you should consider before finalizing your plan. Many homeowners also don’t think about which direction a door will open before it’s too late, and realize it wastes space after it’s installed. You can avoid having to order a new door, or bring painters, carpenters and floor installers back for a costly fix by doing the legwork upfront.

5) Roof pitch. Pitched roofs—for example, those with shingles—versus a low pitch or flat roof—have a number of advantages, including energy savings, a longer lifespan and helping protect your home against the elements. With a pitched roof, and especially a roof with a high pitch, you can also make use of the extra space. One way to utilize that space is to use it to store mechanical equipment like your water heater. If you want a pitched roof, carefully check your plan to make sure it’s adequately high. Sometimes architects will default to a low or flat roof because they look appealing or because of an area’s restrictions on building height. Without a pitched roof though, you may end up needing to buy smaller, and more expensive, mechanical equipment that can fit in your attic, or you might have to spend the money to build a special room to house the machines. It all comes down to your taste and priorities, but understanding these nuances before the building process starts is important.

4.jpg

Identifying all these components on an architectural plan isn’t easy. That’s why we offer preconstruction services where we check our clients’ plans before submission to make sure they get exactly what they need and they’re aware of all costs.

5.jpg

A new build often comes with its share of surprises. You don’t want one of those to be thousands of dollars in unexpected costs. By taking the time to carefully consider and review your architectural plan, you can help ensure your costs stay on track.